

Anatomy of a Restoration

This painting arrived badly damaged with large tears throughout top half as well as missing paint, abraisions, discolored varnish from age, nicotine and soot, and old unmatching overpaint from a previous restoration, as well as a rotten tack strip. Also painting had been stretched far too high, causing signature to remain hidden under frame rabbet (customer was not even aware that there was a signature until time of unfitting) so steps were taken to lower the entire piece for this to show once reframed.
Detail of tears.
Detail of tear with signature previously stretched too high.
Closer detail of both.
Back of canvas showing tears as well as an old patch that must be removed.
Closer detail of tears from back.
Closer detail of old patch.
Removal of tacks to separate painting from stretcher in preparation for lining with new canvas backing.
Removal from stretcher reveals a fair amount of dirt along what was bottom edge of painting as well as a smaller patch underneath the larger one, and old brittle hide skin glue that must be scraped off before lining process can begin.
Scraping off the old glue one milimeter at a time.
Once all old patches, dirt and glue have been removed from back of painting, a new piece of linen has been attached to back using a microcrystalline wax blend to strengthen piece, consolidate tears and create new, strong tack strips for restretching. (please note that full signature now shows but has break from stretcher edge as well as many tack holes across top edge from previous incorrect placement.)
Detail of tears, now consolidated from new linen backing.
Careful cleaning of all surface dirt, old varnish and overpaint may now begin.
Next step is to add a small strip of fresh linen along entire top of the painting to create a new top edge that will be level with original. This will allow signature to show once restored and restretched.
Detail of new linen along top edge.
Restretched on orignal stretcher with new top edge revealing signature as well as all tears, chips and tack holes filled to level the surface for inpainting.
Detail of filled tears and old tack holes.
Closer detail of new top edge.
Breaking up the line little by little. All inpainting is done on missing areas only.
Tears have now been inpainted as well as signature and old tack holes. Only the stretcher break line remains.
Detail of finished corner.
Closer detail showing fully restored signature and new edge blended in.
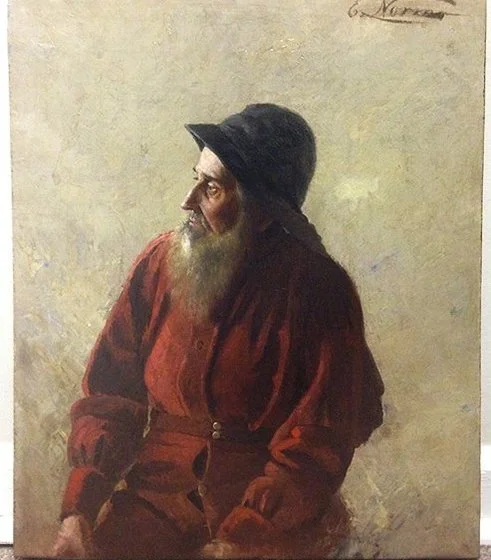
Before Restoration
Fully Restored

Have Questions Regarding Your Restoration Project?